
In my last article, I covered how a chatbot engine works. The next piece of the puzzle is the middleware or backend server which sends the user query from the UI to Dialogflow. Let’s see how we can build and integrate custom middleware to Dialogflow!
In my last article, I covered how a chatbot engine works. The next piece of the puzzle is the middleware or backend server which sends the user query from the UI to Dialogflow. Let’s see how we can build and integrate custom middleware to Dialogflow!
For our middleware, I chose Flask. Flask is a very popular web framework used to build server-side applications.
First, let’s install Flask using the command,
pip install Flask
Now create a app.py in your project folder. Import the necessary modules for the middleware.
from flask import Flask, redirect, url_for, request, render_template
import requests
import json
from dialogflow import Dialogflow
Let’s create a route ‘ /chatbot/send_to_df ’ where the UI (web app, mobile app, IOT app, etc.) can send the user query.
This dummy endpoint now responds with a success message anytime it’s pinged.
from flask import Flask, request
import requests
import json
from dialogflow import Dialogflow

app = Flask(__name__)

@app.route('/chatbot/send_to_df', methods = ['POST'])
def index():
    if request.method == 'POST':
        return json.dumps({"success": 200})

if __name__ == '__main__':
  app.run(debug=True)
Let’s fill it up with some actual code! Ideally, you need to send the user query to Dialogflow and then return back whatever Dialogflow has interpreted. Let’s dive in!
To communicate with Dialogflow via API requests, we need to be authorized - basically get the required API keys and credentials. To get the credentials file of your Dialogflow project, go to IAM Admin section of your console, then select your project.
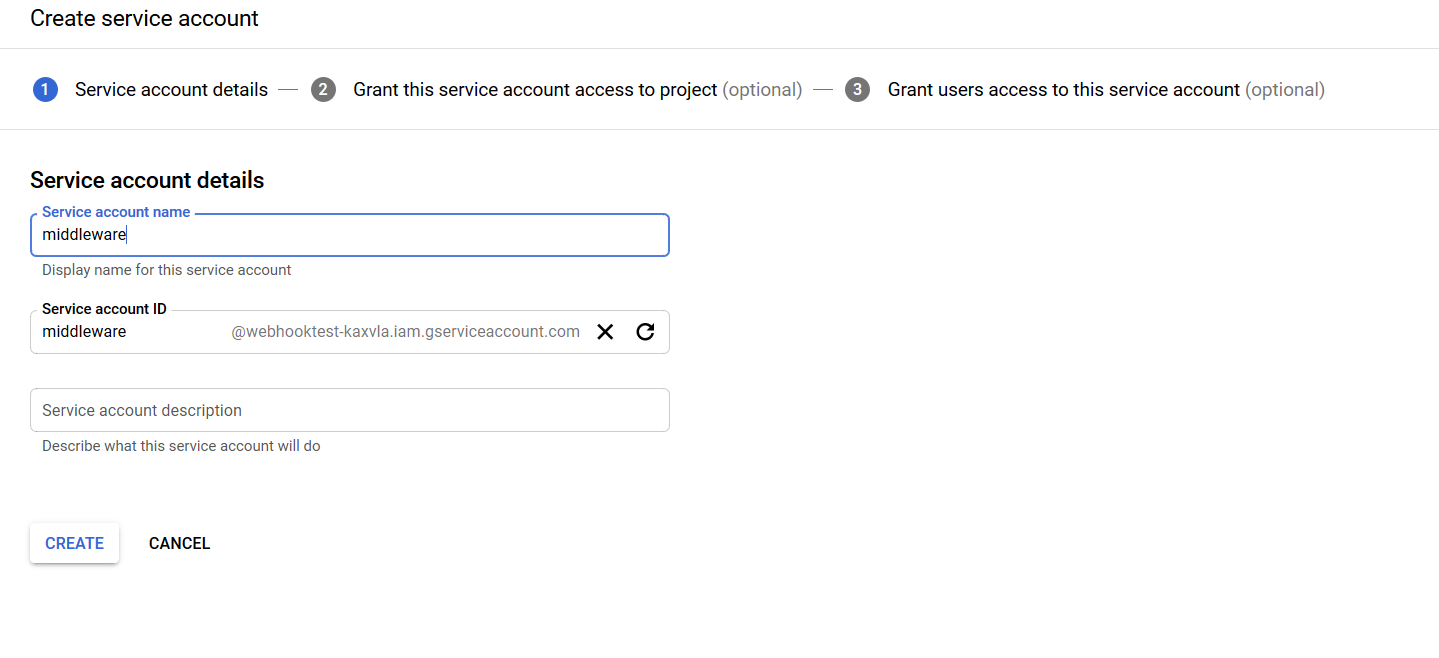
Then, click on the “Create Service Account” button.

Give a name to your service account, then click on “Create”
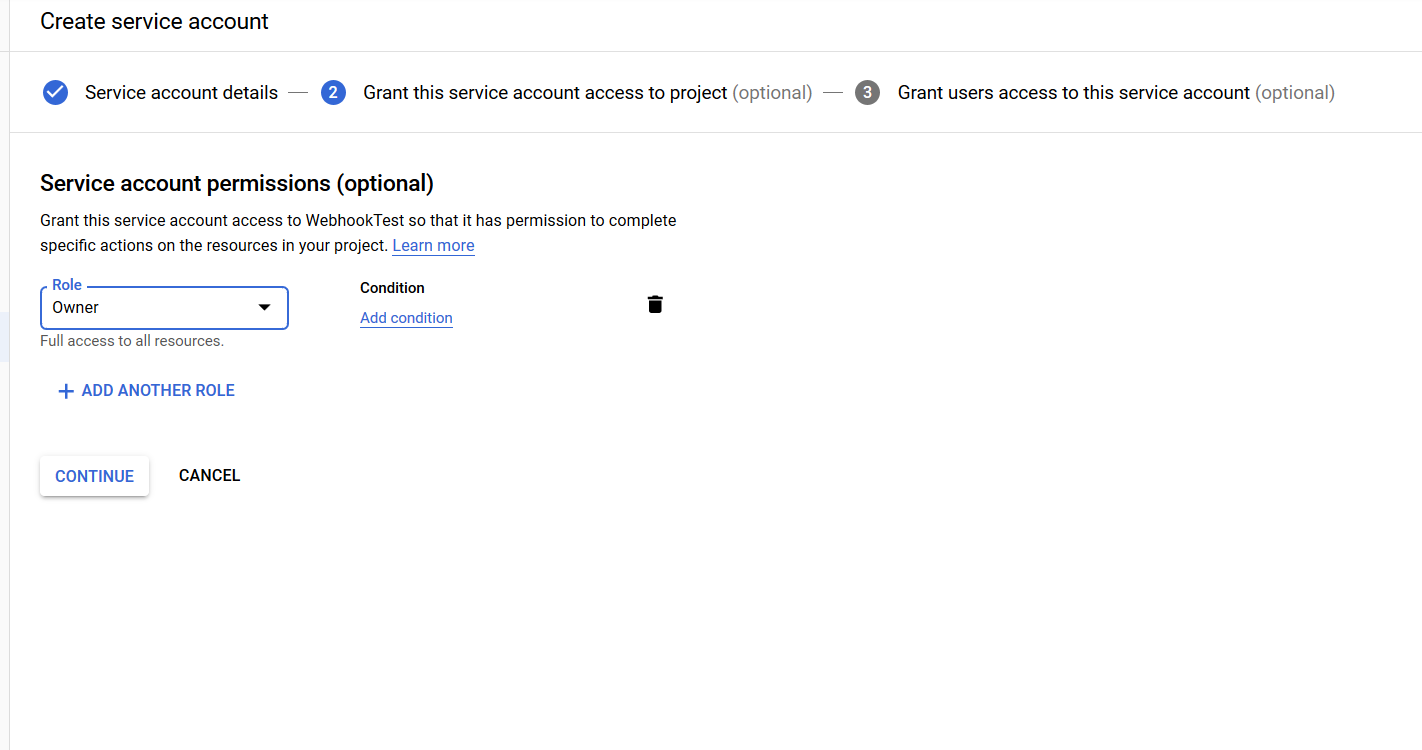
On the next page, Select the role “owner” and click on “Continue”
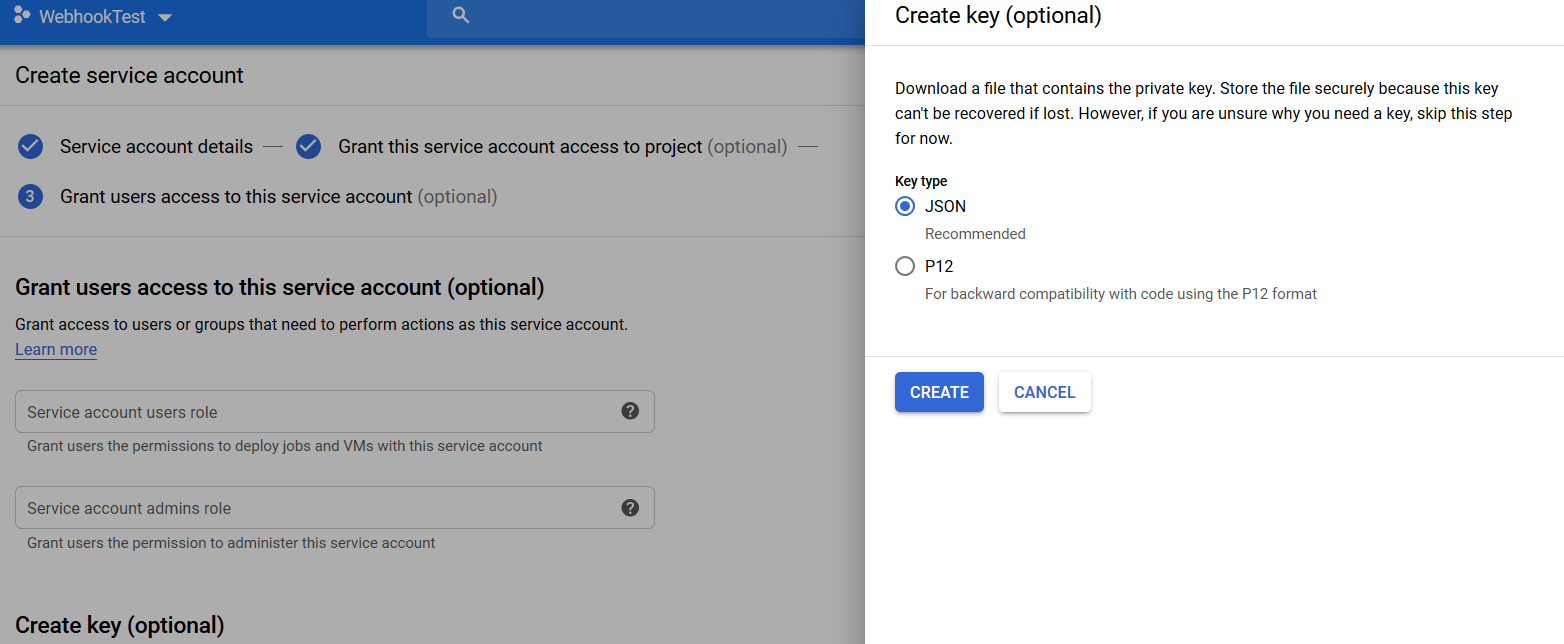
Click on “Create Key”.
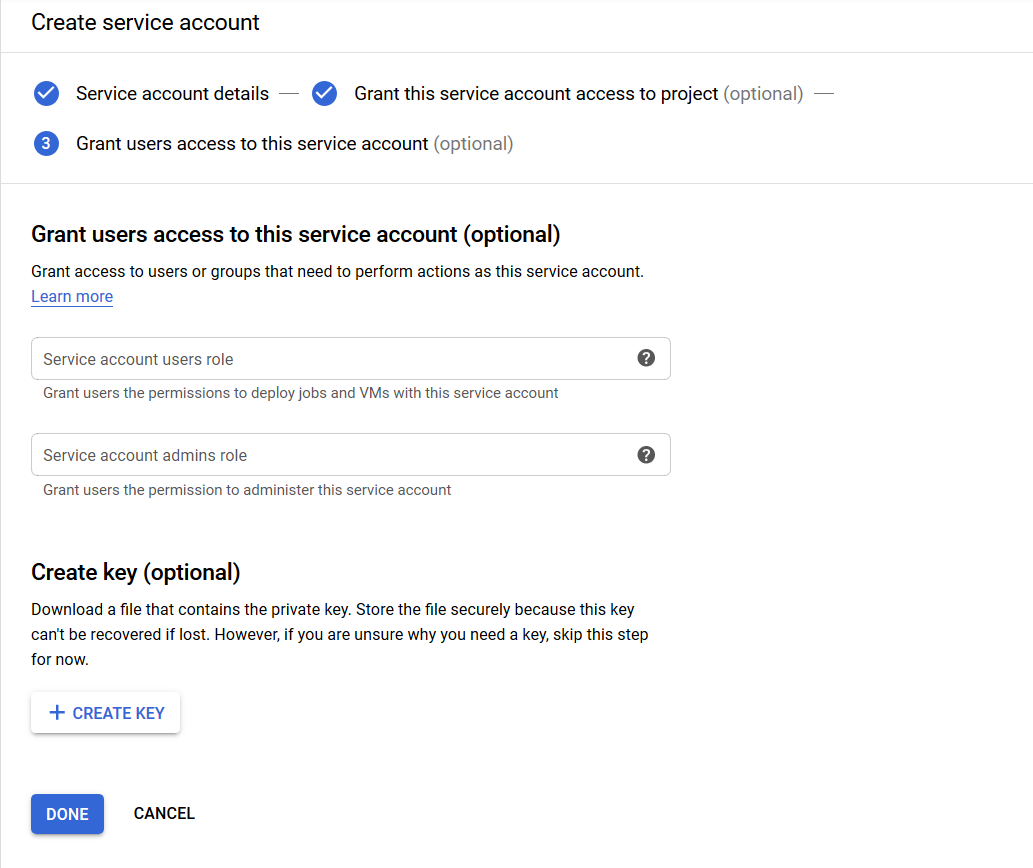
Finally select “JSON file”
Now create a file called “dialoglfow.py” back in our Flask project folder. Here we will send user queries to the Dialogflow API client.
Now read from the downloaded JSON file and extract the “project_id”.
AUTH_KEY_FILE = open('dialogflow.json')
AUTH_KEY_FILE = json.load(AUTH_KEY_FILE)
PROJECT_ID = AUTH_KEY_FILE['project_id']
Now let’s write a class that has “post” and “parse” methods. The post method will send the user query to Dialogflow and get the Dialogflow response, where as the parse method will parse the response from Dialogflow and send it back to the UI.
In the init method we will be parsing session id and user query from the UI.
def __init__(self, request_data):
  self.query = request_data['text']
  self.query = {
    "text": {
      "text": self.query,
      "language_code": 'en'
    }
  }
  self.sessionId = request_data['session_id']
  self.sessionClient = dialogflow.SessionsClient()
  self.session = self.sessionClient.session_path(PROJECT_ID, self.sessionId)
The request from the UI will look like this.
{
  "text" : "Hi",
  "session_id": "unique"
}
To get the request from UI, add the line in app.py
request_data = request.get_json()
Now app.py will look this:
from flask import Flask, request
import requests
import json
from dialogflow import Dialogflow

app = Flask(__name__)

@app.route('/chatbot/send_to_df', methods = ['POST'])
def index():
    if request.method == 'POST':
        request_data = request.get_json()
        return json.dumps({"success": 200})

if __name__ == '__main__':
  app.run(debug=True)
Back to dialogflow.py file. In the init method add the following line:
self.sessionClient = dialogflow.SessionsClient()
The above line initializes the Dialogflow session client where we can retrieve user input and pass it to the “detect_intent” method.
Dialogflow requires a session path to get the predicted response. Session path will look something like this
projects/<Project ID>/agent/sessions/<Session ID>, or projects/<Project ID>/agent/environments/<Environment ID>/users/<User ID>/sessions/<Session ID>
To get the session path we can use the “session_path” method, which requires “project_id” and “session_id”.
self.session = self.sessionClient.session_path(PROJECT_ID, self.sessionId)
Finally, the init method will look like this
def __init__(self, request_data):
  self.query = request_data['text']
  self.query = {
    "text": {
      "text": self.query,
      "language_code": 'en'
    }
  }
  self.sessionClient = dialogflow.SessionsClient()
  self.sessionId = request_data['session_id']
  self.session = self.sessionClient.session_path(PROJECT_ID, self.sessionId)
Now let’s create our post and parse method. In our post method, we use the “detect_intent” method which gets you the predicted response.
def post(self):
  response = self.sessionClient.detect_intent(session = self.session, query_input = self.query)
  return response
The response will be in the type of protobuf.
In our parse method, we will convert the method object into a JSON format and we will send only the necessary parameters to the UI.
To convert the method object into json, we can use “google.protobuf.json_format” lib.
from google.protobuf.json_format import MessageToJson

def parse(self, response):
  response = MessageToJson(response)
  jsonResponse = json.loads(response)
  fullFillmentText = jsonResponse['queryResult']['fulfillmentText']
  return fullFillmentText
After converting the protobuf object to json. The response will look like this
{
"responseId": "SOME ID",
"queryResult": {
  "queryText": "hi",
  "action": "input.welcome",
  "parameters": {},
  "allRequiredParamsPresent": true,
  "fulfillmentText": "Hey! Welcome to healthbot. What is your age?",
  "fulfillmentMessages": [
  {
      "text": {
      "text": [
          "Hey! Welcome to healthbot. What is your age?"
      ]
      }
  }
  ],
  "outputContexts": [
  {
      "name": "projects/PROJECT_ID/agent/sessions/SESSION_ID/contexts/defaultwelcomeintent-followup",
      "lifespanCount": 1
  }
  ],
  "intent": {
  "name": "projects/PROJECT_ID/agent/intents/46252242-7a32-4060-a0f5-0c94188ba089",
  "displayName": "Default Welcome Intent"
  },
  "intentDetectionConfidence": 1,
  "languageCode": "en"
}
}
Let us call this Dialogflow class in app.py.
from flask import Flask, request
import requests
import json
from dialogflow import Dialogflow

app = Flask(__name__)

@app.route('/chatbot/send_to_df', methods = ['GET','POST'])
def index():
  if request.method == 'POST':
    request_data = request.get_json()
    df = Dialogflow(request_data)
    response = df.post()
    payload_response = df.parse(response)
    return payload_response


  if request.method == 'GET':
    return 'Welcome'

if __name__ == '__main__':
  app.run(debug=True)
To test this out, you can use Postman or Insomnia to make a post request. You should now be able to talk with your chatbot. 🎉
I hope this blog will be useful for the developers who are trying to integrate their middleware with Dialogflow!
Up next
Accelerate Business Growth with RPA in Dubai