
In this article, we will learn how to process and calculate the salary of employees by deducting the leaves amount and adding the increment if any, to the overall salary using Robotic Process Automation.
“If you are lucky enough to be someone’s employer, then you have a moral obligation to make sure people do look forward to coming to work in the morning”. -John Mackey
Any organization is defined by its values and employees. Employees are the greatest asset of any organization. So, employers must make sure that their employees get paid to what they deserve.
Payment mistakes can happen faster than you think. For a moment think about the employees for whom monthly salary is the only source of income. Imagine what if the salary is not paid accurately or there is a delay in releasing salary? Such irregularities can take a toll on the morale of the employees and ultimately affect business productivity.
When you use Robotic Process Automation (RPA) for Salary Process Calculation, you can achieve this without human error. Also, RPA bots are pretty fast when compared to human and can do the work within no time and also return high ROI.
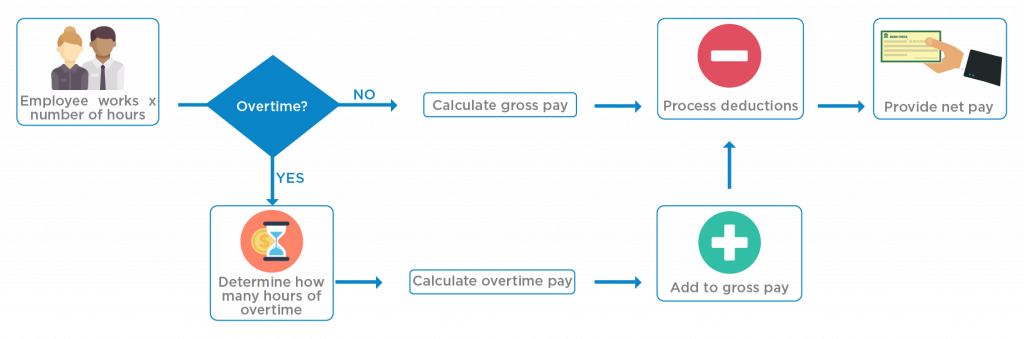
The payroll process is not so easy, and it involves a lot of steps.
- Collecting employee information
- Calculate deduction
- Calculate increment
In this article, we will see how can we perform the entire salary processing using RPA. We will achieve this using data present in excel file and RPA to process the salary.
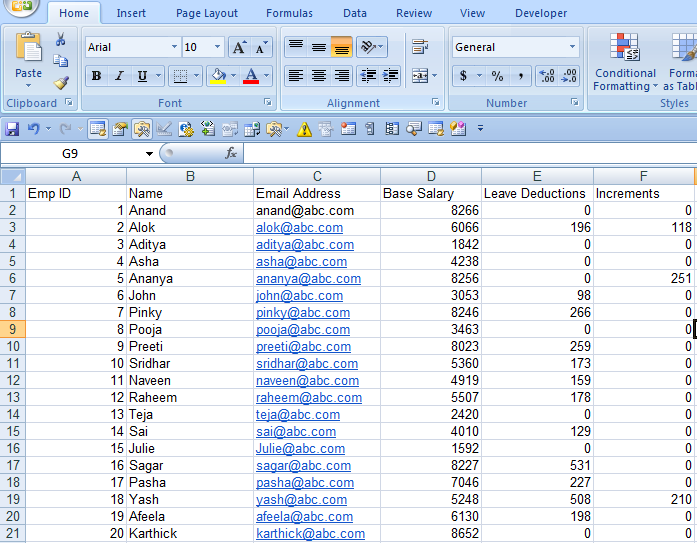
Consider we have an excel file with three sheets.
- Employee Details
- Leaves
- Increment
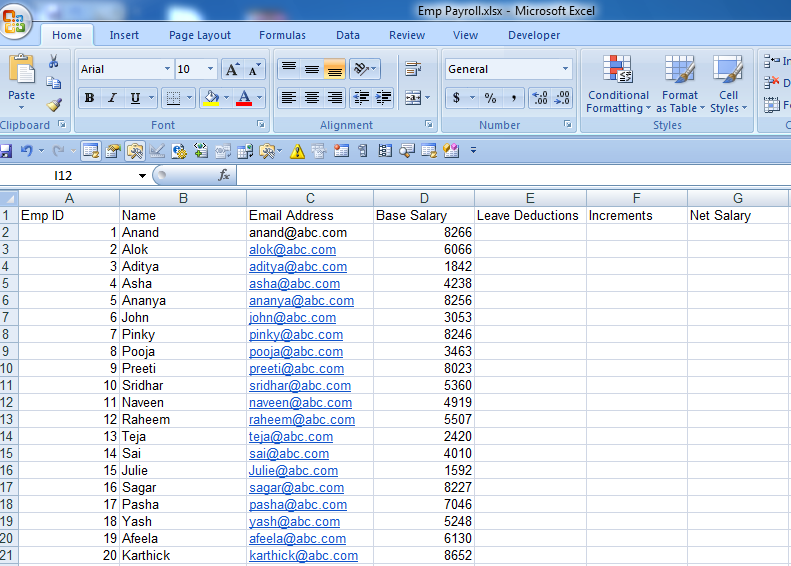
Fig 1: Employee Details sheet

Fig 2: Leaves Sheet
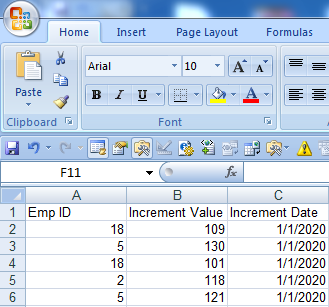
Fig 3: Increment Sheet
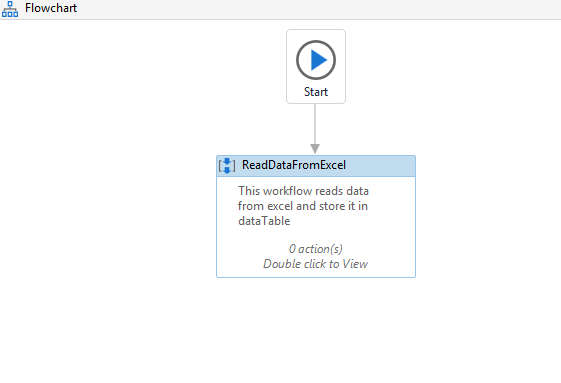
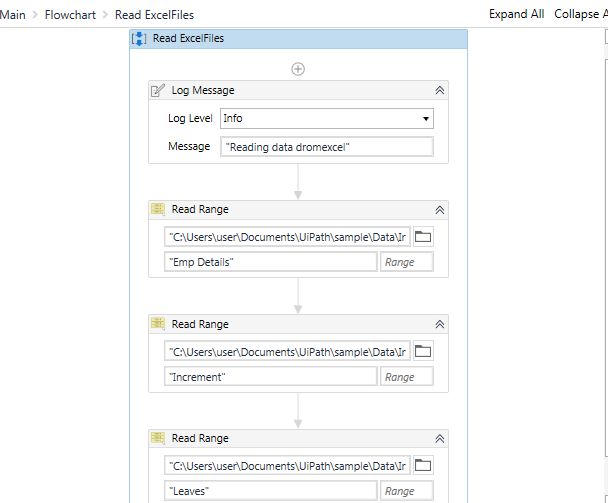
Read the excel sheets and store it in DataTable:
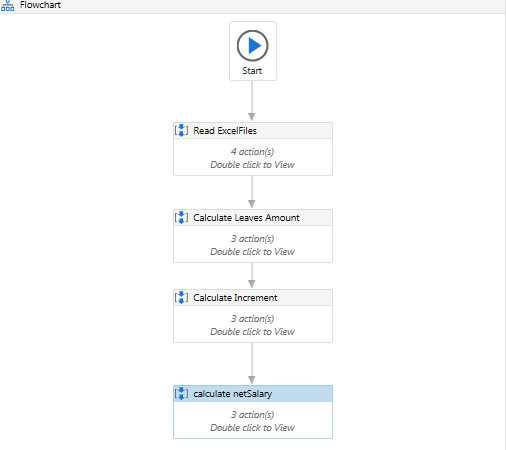
We will start UiPath Studio, and drag flowchart in the working panel.
Drag one sequence and attach it with flowchart. Inside this sequence, we will read data from the excel file and store it in DataTable.
E.g. DT1, DT2 and DT3 respectively.
It looks like this.
Drag three readRange activity under workbook and assign each sheet of the excel with it.
Calculate the deduction from the deduction sheet and add corresponding value to the employee Sheet :
Drag one more sequence and name it as calculate deduction and add an annotation to it.
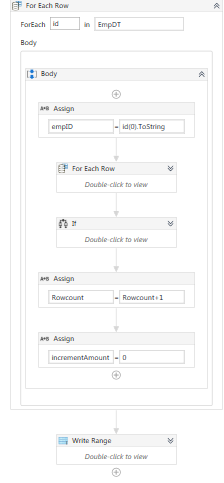
Drag one for each row activity and assign it to DT1
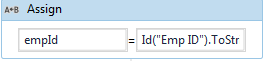
Drag one assign activity and assign it the value of empID (here empID is variable of String type).
E.g. EmpID = row(“Emp ID”).toString
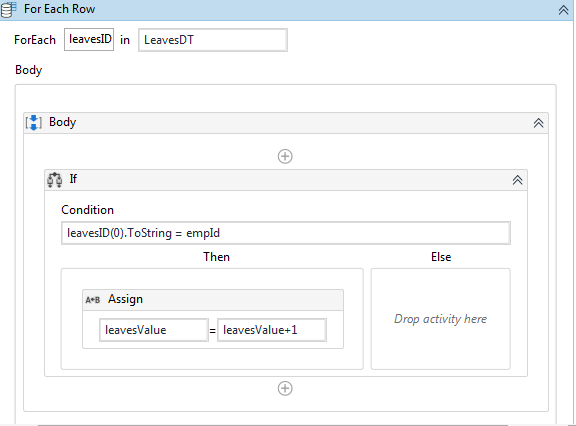
Drag one more for each row activity and assign it to DT2
Drag one IF activity and check for the condition
leavesID(“Emp ID”).ToString = empId (here leavesID is used in place of row).
Then inside the block of IF activity drag one Assign activity.
Increment the leaves count for every empID that matches.
E.g. leavesCount = leavesCount +1 (here leaves count is a variable of Int32 type).
Outside Leaves for each activity.
Drag one more assign activity and assign the values of calculated deduction
The formula for calculating deduction:
(BaseSalary/No of days in month) * No of leaves
calculatedLeaves = cint((cint(Id(“Base Salary”))/31)*leavesValue) ‘calculatedLeaves variable
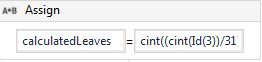
We will calculate one more variable RowCount, which will write the calculatedLeaves to the assigned row.
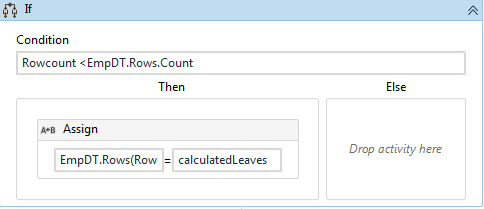
To be on the safer side, we will also check the rows in which we are writing the value does not exceed the row present in the sheet.
For this we will drag one more If activity and check,
Rowcount <EmpDT.Rows.Count
Then in the block of the IF activity we write the calculatedLeaves to the dedicated column.
EmpDT.Rows(Rowcount)(4) = calculatedLeaves (4 is the column number in which we are writing).
Drag 2 more assign Activity
Increment rowCount value and initialize the leavesCount to 0
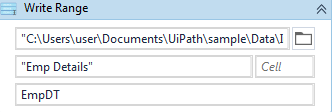
Drag one write range activity outside for each row and write the DT1 to it.

Overall workflow:

After executing the workflow:

Calculate the increment from the increment sheet and add corresponding value to the employee Sheet :
Drag one more sequence and name it as calculate increment and add an annotation to it.
Drag one for each row activity and assign it to DT1
Drag one assign activity and assign the value of empID (here empID is variable of String type)
E.g. EmpID = row(“Emp ID”).toString

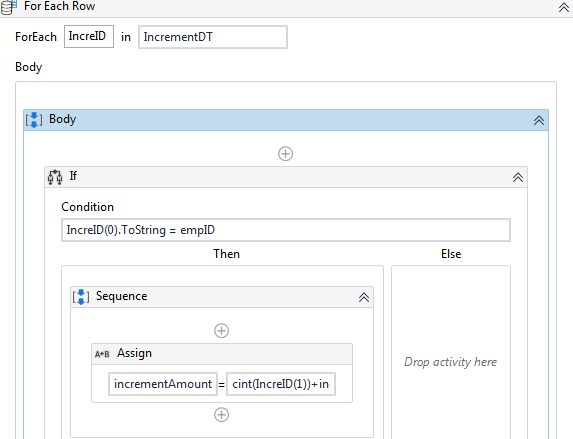
Drag one more for each row activity and assign it to DT3.
Drag one IF activity and check for the condition,
incrementID(“Emp ID”).ToString = empId (here incrementID is used in place of row).
Then inside the Block IF Activity,
Drag one assign activity,
incrementAmount = cint(IncreID(1))+incrementAmount (here incrementAmount is a variable).
We will calculate one more variable RowCount, which will write the incrementAmount to the assigned row.
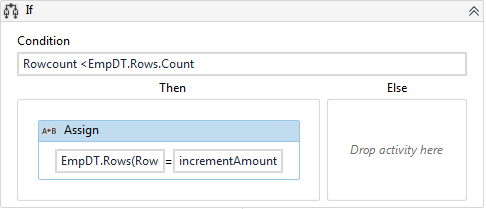
To be on the safer side, we will also check the rows in which we are writing the value does not exceed the row present in the sheet.
For this, we will drag one more IF activity and check,
Rowcount <EmpDT.Rows.Count
Then in the block of the IF activity we write the incrementAmount to the dedicated column.
EmpDT.Rows(Rowcount)(5)= incrementAmount (5 is the column number in which we are writing).
Drag 2 more assign Activity.
Increment rowCount value and Initialize the leavesCount to 0.
Drag one write range activity outside for each row and write the DT1 to it.
Overall workflow:
Output after executing the workflow:
Calculate the netSalary and update it in the respective column:
Drag one more sequence and name it as calculate increment and add an annotation to it.
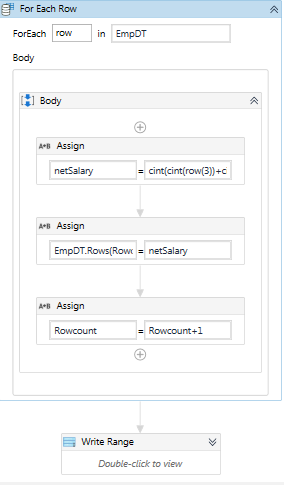
Drag one for each row activity and assign it to DT1.
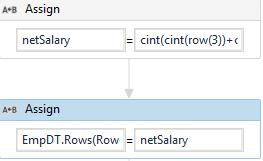
Drag two assign activity and assign it the value of netSalary (here netSalary is variable of int32 type).
netSalary = cint(cint(row(“Base Salary”))+cint(row(“Leave Deductions”)))
EmpDT.Rows(Rowcount)(6) = netSalary (6 is column number and rowCount is int32 type).
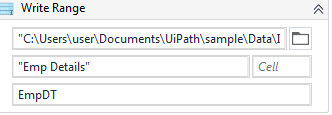
Drag one write range activity and assign DT1 to it.
Overall workflow:
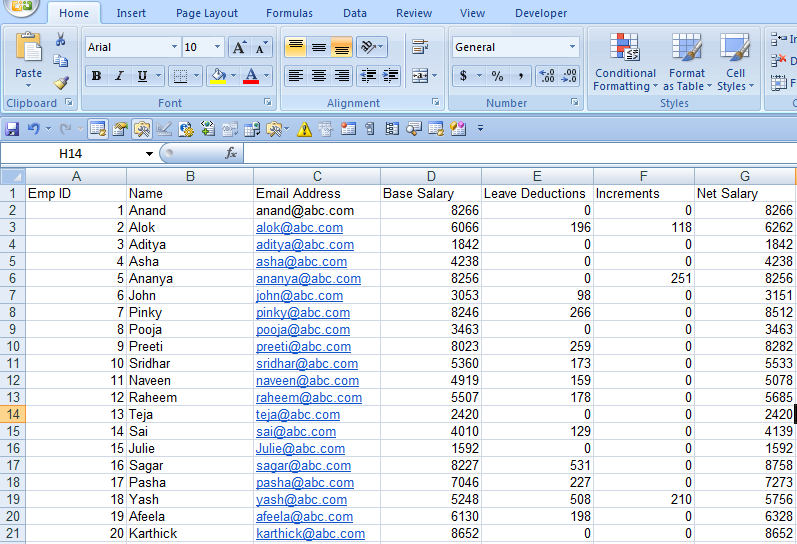
After executing the workflow, the output is
The Overall workflow is
If we run the above workflow, we can calculate the netSalary of the employee within a few seconds.
This is how RPA can be used to calculate and process the salary. It can also be emailed as per required, which we will see in our next article.
For any query, please leave a comment here. For more information about business-related automation, you can reach out to us at business@skcript.com.
Happy Automation ☺.
Up next
Deploying React App to Firebase Hosting